
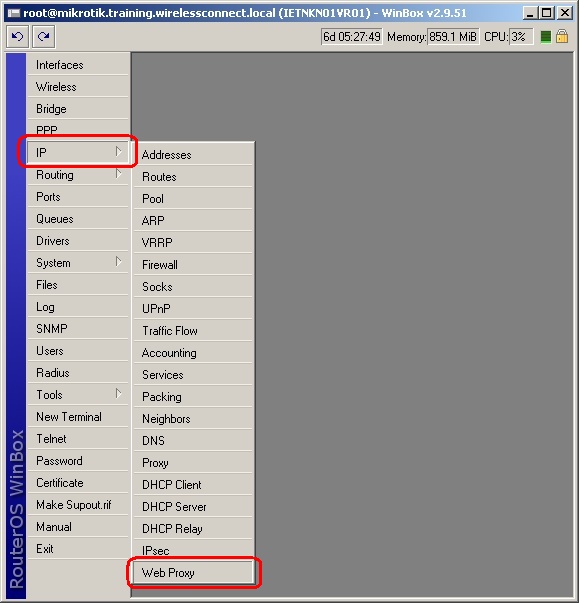
Klik Gambar / iklan dibawah untukdapat update informasi tentang VPN dan settingan di blog ini, terima kasih .
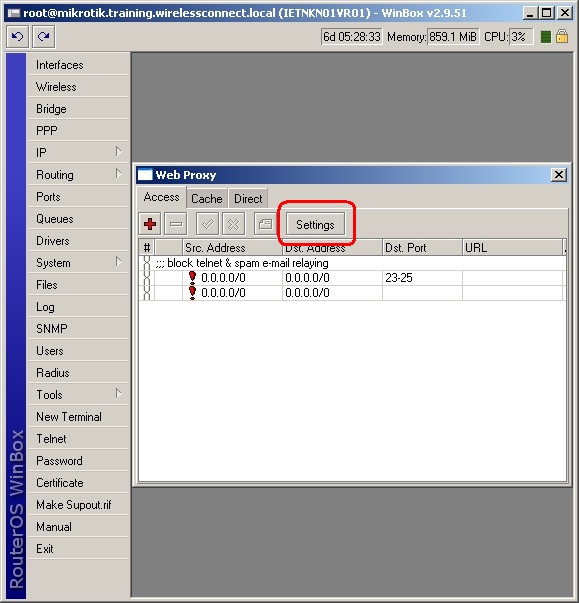
- Click on Settings as shown below
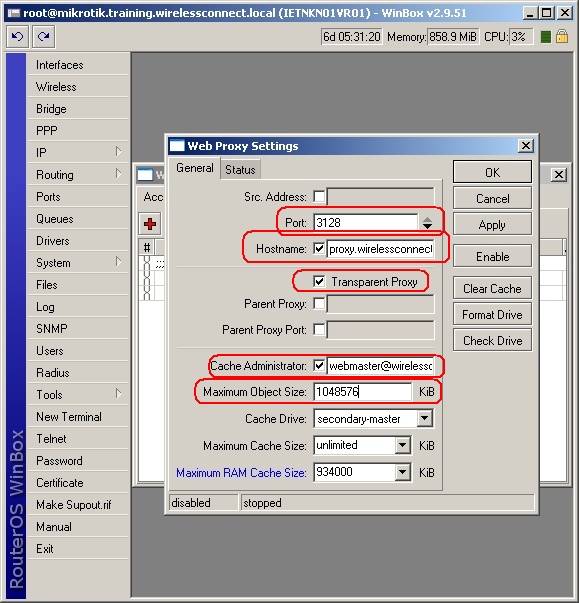
- Fill in the following details as shown in the picture below
- Port:-- select 3128 (standard Squid TCP Port) or 8080 (typically used Http proxy server TCP port) however any available port on the Router OS Appliance can be used (provided that the port is not already being used by another process)
- Host name -- Select a host name that you desire (it is not crucial however it is useful for handing out a dns name such as proxy1.wirelessconnect.eu ... (Remember to update your DNS server with the Proxy IP address before issuing the name to clients
- Transparent Proxy -- Tick this Box if the Proxy Server is to be Transparent, ie the user will not be required to configure their browser (note additional firewall configuration (redirect rule will need to be inserted to make this work see bottom of article for more details)
- Cache Administrator-- Select an Administrative Email-address for receiving feedback on your Proxy Appliance Performance
-
Maximum Object Size -- Select a reasonable size (It should be large
enough for most users uses ...e.g Service Pack 2 Download ... Patch CD
ISO,) however it should not exceed the Size of the Caching Disk (We
Recommend that the Maximum Object Cache be a tiny fraction of the total
cache size i.e. Maximum Object Size should << 1% of Caching Disk)
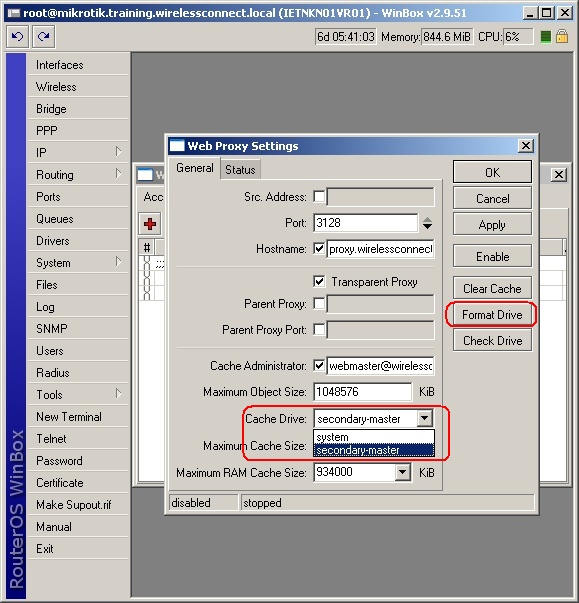
- Select the correct Drive (secondary-master) as the Cache Drive and then click Format as shown below (Note that Router OS wont Let you format the System Drive)
- When prompted to confirm the formatting as shown below

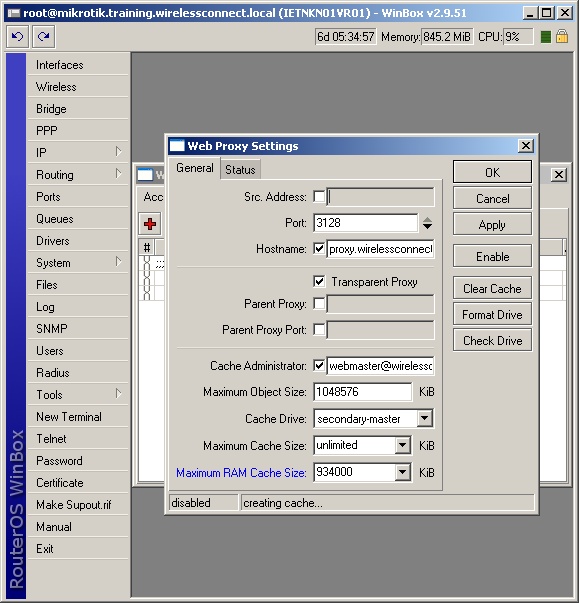
- While the cache drive is formatting , "formatting harddrive" will appear on the status bar on the bottom of the dialogue box as shown below

- After the formatting process is complete the Cache will be created & "Creating Cache" will appear on the status bar at the bottom of the dialogue box as shown below.
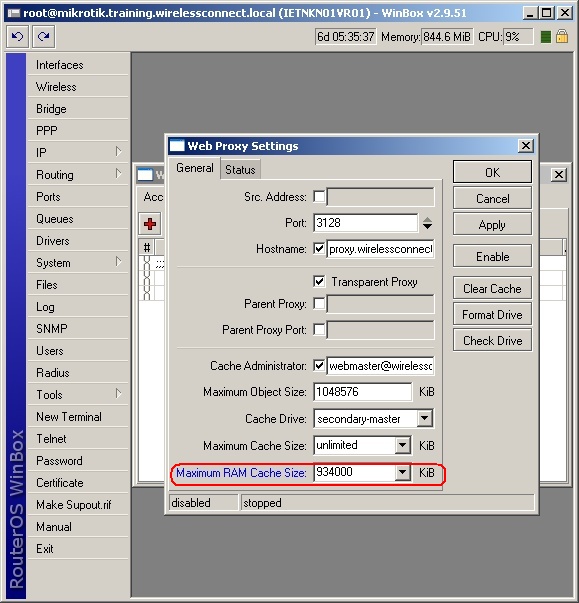
- Select the Maximum RAM Cache Size, this should be no greater than the result of the following formula -- (Total RAM on Proxy Appliance) - 64 MB Ram (For Router OS and Other Router OS Process) in this example one has an appliance with 1GB of Memory installed and one wishes to reserve 68 MB of RAM for system use therefore one should set the Maximum RAM Cache Size to 934MB as shown in the image below
- Next Turn on the Proxy Server by clicking Enable as shown below
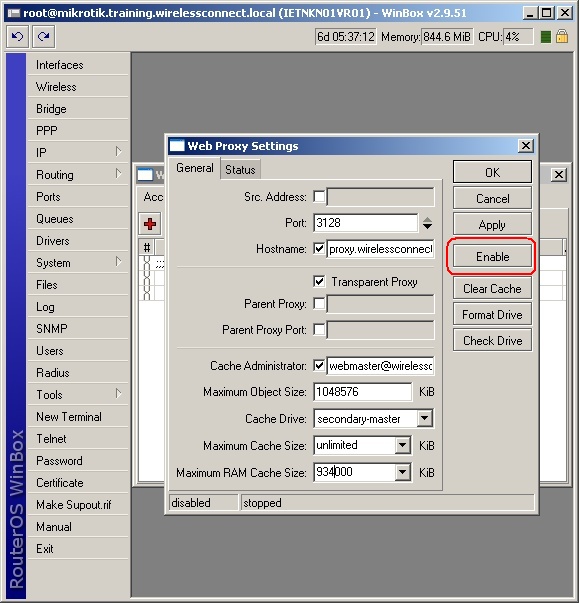
- Once the Proxy Service is running the status bar will show "Running" on the bottom of the dialogue box as shown below

Post a Comment