
Update Image by Super Client ccboot
Taking the client PC101 as an example, the operation steps are as follows:
1) Before updating, please backup image files. (For methods of backup image files, please refer to "Backup Image")
2) On the main interface of the CCBoot, click the "Client Manager", and in the detailed pane on the right side, double-click the "PC101" (Figure 1‑1).

Figure 1‑1
3) In the pop-up "CCBoot Client" dialogue box, click the "Enable Super Client" button (Figure 1‑2).
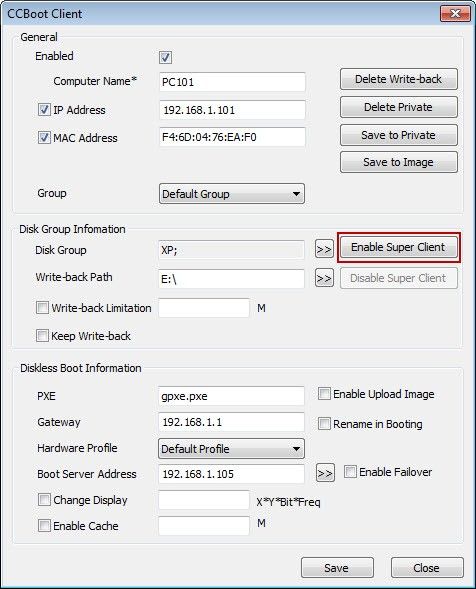
Figure 1‑2
4) In the pop-up "CCBoot Select Disk" dialogue box, select the image
package which needs updating, and then click the "OK" button (Figure
1‑3).
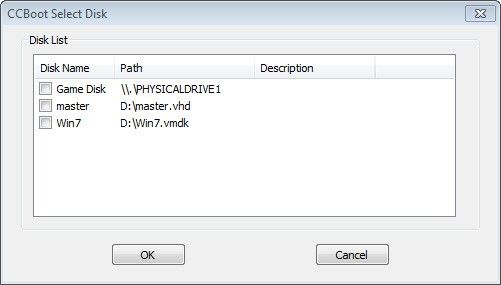
Figure 1‑3
5) In the pop-up "Do you want to create recovery point "dialogue box,
if you click "Yes" button, it will create recovery point; if you click
"No" button, it will not create recovery point (Figure 1‑4). Note: From CCBoot v3.0 build 20131007, the work process of super client has been changed. For details, please refer to "Change in Super Client Work Process".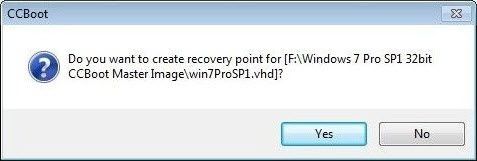
Figure 1‑4
6) In "Do you want to create recovery point" dialogue box, if you click
"Yes" button, it will pop up "CCBoot Recovery Properties" dialogue box,
enter "Description" in the edition box of description, and then click
"OK" button, you can finish creating recovery point (Figure 1‑5).
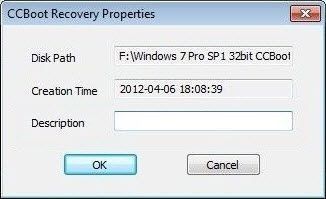
Figure 1‑5
7) Diskless boot the client PC101, and take the updating operation on
the PC101. After the operation is completed, close the client.
8) On the main interface of the CCBoot, double-click "PC101" again.
9) In the pop-up "CCBoot Client" dialogue box, click the "Disable Super Client" button (Figure 1‑6).
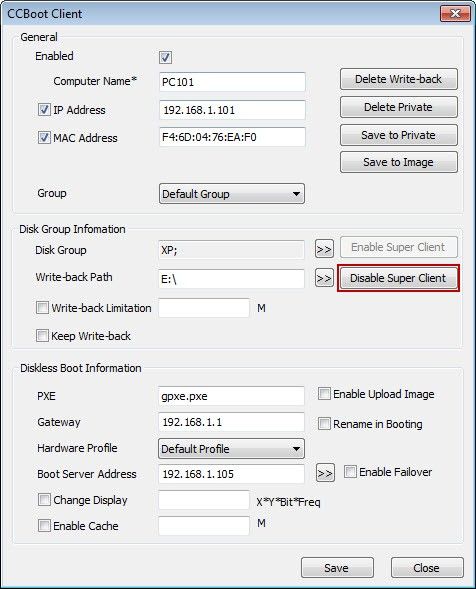
Figure 1‑6
Notes:
1) In the fifth step, if you click "No" button, use "Super Client" directly on the image package to take update operation, so the changed image package can't be recovered.
2) In the fifth step, if you click "yes" button, using this method to update the image, by managing recovery point, you can still recover the image. (For details, please refer to "Recover Image" ) But every time you increase a recovery point, the image file will have one more small file package; (such as sp-001.vhd) so it will have more and more image files. If you want to merge these recovery points, please refer to "Merge Image" for details.


