Latest Post


In the first step, login to your router, launch a browser or use WINBOX application.
Type, default ip address of the router: http://192.168.88.1

Go to “PPP” (1) tab and add (2) new interface: “PPTP Client” (3)


TP-Link

In the “General” (4) tab, in “Name” (5) field , type interface name: VPNonline-PPTP
In the “Max MTU” (6) and “Max MRU” (7) field, type “1400”

TP-Link

Click “Dial Out” (8) tab and fill in the fields below:
In the “Connect to:” (9) field, type the name of one of the VPNonline server


In the “User:” (10) field, type your User Name
In the“Password:” (11) field, type your password
To save settings, click “OK” (12)

TP-Link

Go to the “IP” (13) tab and next to“Firewall” (14)
Select “NAT” (15) tab and add new NAT rule (16)

TP-Link

In the “New NAT Rule” (17) select “Chain: srcnat” (18) and “Out. Interface: VPNonline-PPTP” (19)

TP-Link

In the next step, go to “Action” (20) tab and in the “Action” (21) field choose “masquerade”.
Click“OK” (22)


TP-Link

Go to the“Mangle” (23) tab and add new rule (24)

TP-Link

In the “New Mangle Rule”, select “General” (25) tab, and choose “Chain: prerouting” (26).
In the “Src Address” (27) field, type either the IP, or the IP range which you wish to have routed through the VPN tunnel.


In this example, we are using source address in order to identify packets which should be routed throught VPN (192.168.88.2-192.168.88.254). You can also use other means of identification or a combination of identifiers such as destination port and source address. Keep in mind, you need to make sure that traffic originating from the MikroTik router is exluded from this marking or it will attempt to communicate with the VPN server through the VPN itself, causing the connection to brake.

TP-Link

Go to “Action” (28) tab and in the “Action” field choose “mark routing” (29)
In the “New Routing Mark” (30) field, type “VPNonline”
To save the settings click “Apply: (31) and “OK” (32)

Klik Gambar / iklan dibawah untukdapat update informasi tentang VPN dan settingan di blog ini, terima kasih .


TP-Link

Go to “IP” (33) and “Routes” (34) tab
Select “Routes” (35) tab, and add New Route (36)

TP-Link

In the “General” (37) tab, choose:
“Dst. Address” (38) – 0.0.0.0/0
“Gateway” (39) – VPNonline-PPTP
“Routing Mark” (40) – VPNonline
To save settings, click “OK” (41)

TP-Link

The new route has been added (42) and the VPN connection should be established

TP-Link

If you have any problem with the configuration or have any questions feel free to mail us: rubaimohamad@yahoo.com
CP : 081391800081
Thanks


Point Blank Garena


Apa itu PB Garena? Game yang sama dengan PB Indonesia yang di sponsori oleh PT. Kreon tetapi PB Garena di sponsori oleh Garena Singapura, memang dari segi visual ada sedikit perbedaan tapi dari cara bermain, gerak character 99% sama tidak seperti PB vs Counter Strike yang dari sisi game play masih jauh lebih unggul PB. Untuk troper PB yang suka permainan bersih tanpa cheat maka PB Garena adalah solusinya karna game ini tergolong baru dan masih dalam masa uji coba sehingga masih bersih dari noda cheater, dan untuk troper yang ingin memulai masa troper dari bayi maka game ini sangat cocok.
Akan tetapi karna troper Indonesia sudah terkenal se-antero jagad raya permasalahan cheaternya maka pihak Garena Singapura melakukan pemblokiran untuk ip Indonesia, sehingga anda tidak dapat bermain jika masih menggunakan ip Indonesia.   oleh sebab itu dibutuhkan sebuah jalur khusus untuk dapat bermain game ini, sebuah jalur yang dapat merubah akses game anda terdeteksi menggunakan ip local Singapura bukan ip Indonesia lagi, salah satu solusinya adalah pemasangan vpn untuk jalur khusus game PB Garena ini 
cara memulai bermain game ini sama dengan Garena Indonesia, yaitu download terlebih dahulu Garena Plus [aplikasi ini hampir sama seperti YM tetapi memiliki fungsi sebagai game launcher]


setelah login tampilannya :


tidak ada pilihan PB Launcher karna anda login ke server Garena Indonesia, caranya klik tombol roda gigi di pojok kiri bawah lalu ubah region menjadi Singapore


setelah pilih region Singapore maka aplikasi minta untuk restart, klik OK dan login lagi maka tampilan game launcher sudah berubah

klik icon PB dan muncul, start jika PB Garena sudah terinstall dan download+install jika belum terinstall. Akan tetapi jika anda sudah merasa menginstall game PB Garena tapi di Garena Plus belum terdeteksi bahwa sudah terinstall maka yang perlu anda lakukan adalah membuka Launcher PB Garena manual dari dalam folder game nya agar dapat tersambung ke Garena Plus.


Demikian penjelasan singkat mengenai apa itu PB Garena dan bagaimana cara memulai bermainnya.

Daftar Harga Setting + akun untuk VPN Garena

1. User Personal : 30rb/bulan
2. Warnet           : 50rb/bulan .

Bisa PM di HP : 081391800081
Klik iklan dibawah untukdapat update informasi tentang game dan settingan di blog ini, terima kasih .


To install the samba package,enter the following command:
sudo apt-get install samba samba-common

Check the version of installed samba software by using this command:
smbd --version

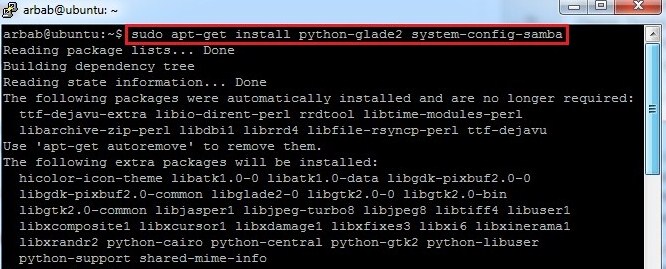
Also install these suggested packages for samba:
sudo apt-get install python-glade2 system-config-samba

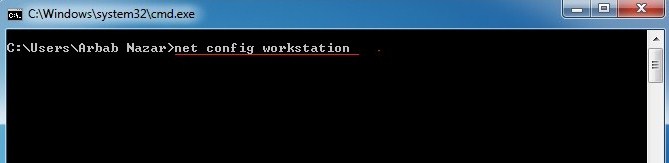
Go to your Windows machine and use this command in order to check the WORKGROUP name:
net config workstation

It will show the output, something like this:

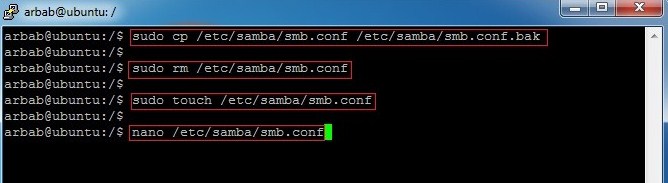
Backup the smb.conf file, then delete it and create the new one:
sudo cp /etc/samba/smb.conf /etc/samba/smb.conf.bak 
sudo rm /etc/samba/smb.conf 
sudo touch /etc/samba/smb.conf 
sudo nano /etc/samba/smb.conf

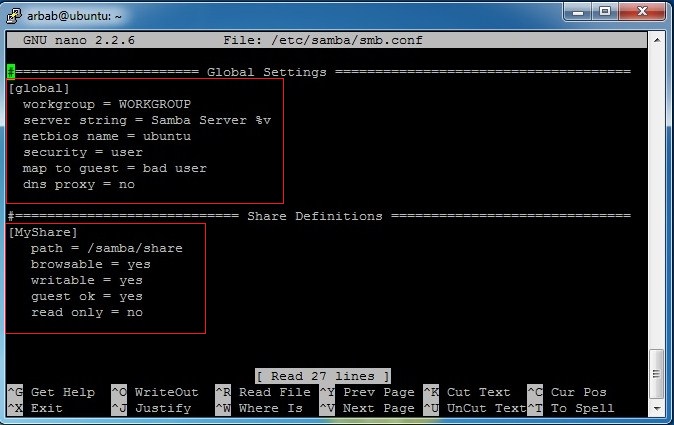
Add this, in your smb.conf file (or change it according to your requirement):
#======================= Global Settings ===================================== 
[global]
workgroup = WORKGROUP
server string = Samba Server %v
netbios name = ubuntu
security = user
map to guest = bad user
dns proxy = no
#============================ Share Definitions ============================== 
[MyShare]
path = /samba/share 
browsable =yes
writable = yes
guest ok = yes
read only = no

Save the smb.conf file and restart the service:
sudo service smbd restart

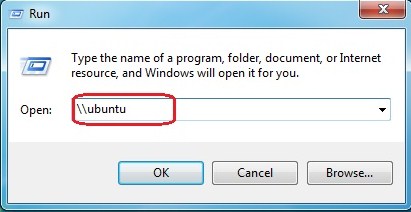
Access the samba share from windows (where ubuntu is the name of my samba server):

wao, we are able to access the samba share successfully :-)

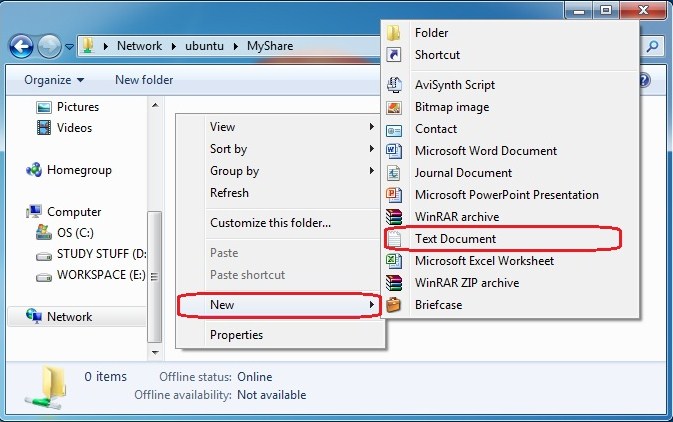
Let’s try to create something, inside the share folder:

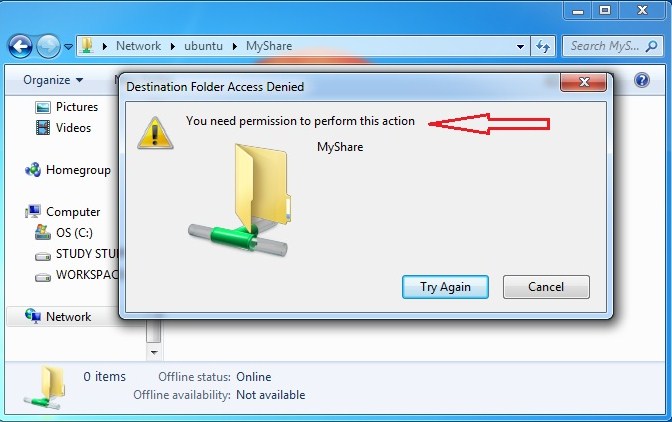
Error, we cannot create anything inside the share folder :-(

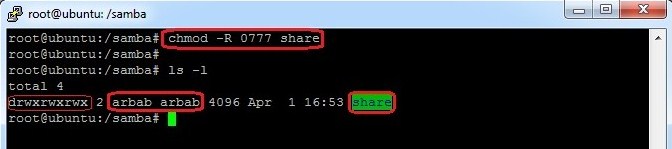
Check the current permission on the samba share:
cd /samba/
ls -l

Change it, in such a way that everyone can read and write it(Check it, that it is allowed in your environment or not):
sudo chmod -R 0777 share
ls -l

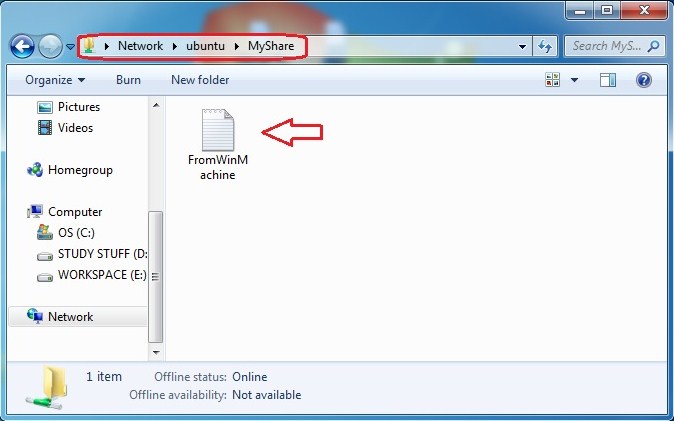
Try to create something again, inside the share folder:

Verify the newly created file on samba server:
cd share/
ls -l 


Part 2: Add and manage users and groups
Add a group in your ubuntu server (in my case smbgrp):
sudo addgroup smbgrp

Create a new share, set the permission on the share ,add the user to the samba group and create samba password:
cd /samba/
sudo chown -R arbab:smbgrp secure/ 
ls -l 
sudo chmod -R 0770 secure/
ls -l
sudo adduser arbab smbgrp
sudo smbpasswd -a arbab

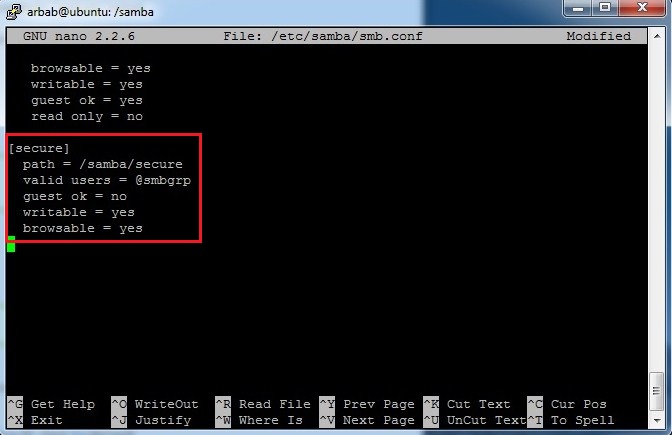
Add the newly created samba share in smb.conf file:
[secure]
 path = /samba/secure
 valid users = @smbgrp
 guest ok = no
 writable = yes
 browsable = yes

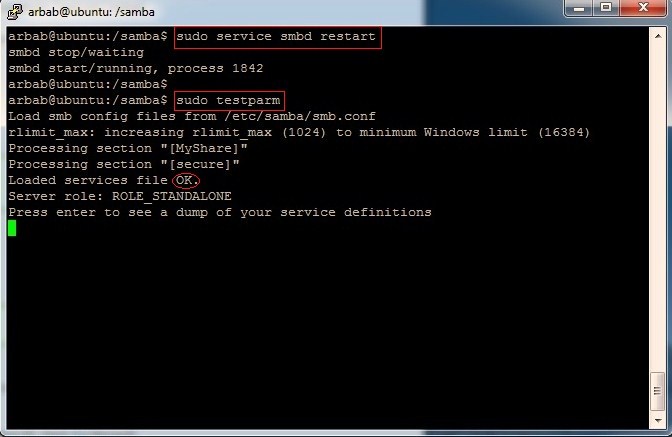
Restart the samba service and check the syntax error with testparm:
sudo service smbd restart 
sudo testparm

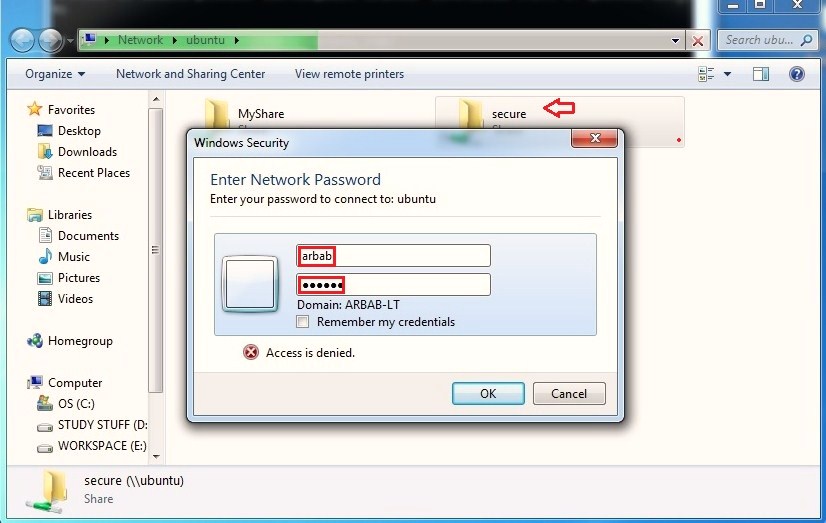
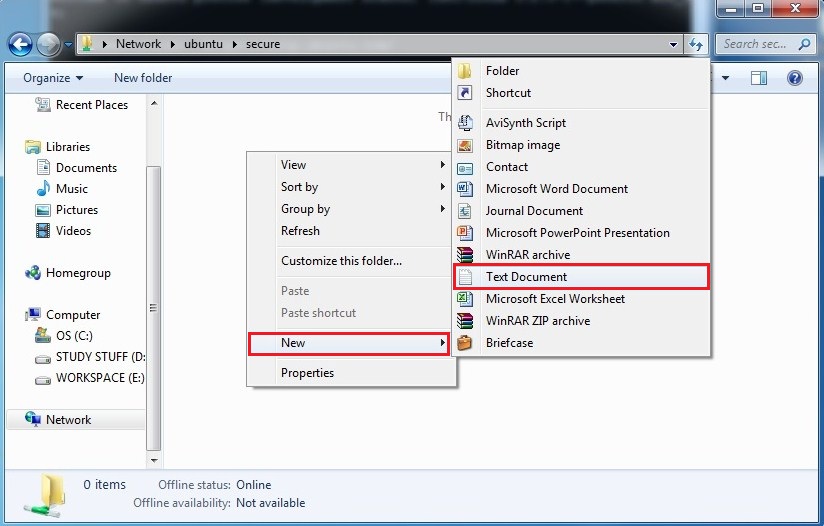
Testing from Windows Machine:


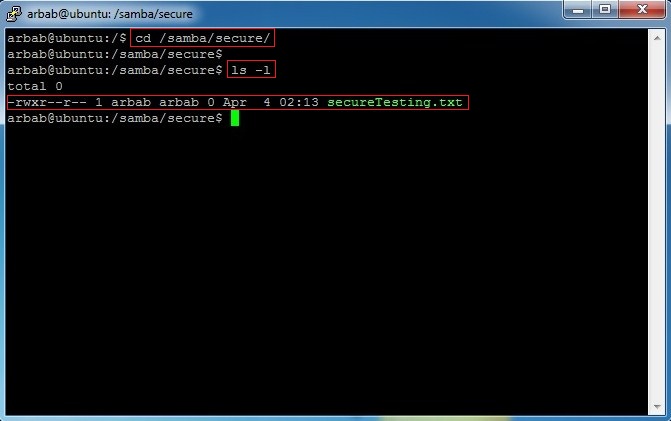
Verification from Ubuntu server:
cd /samba/secure/
ls -l

Author Name

Formulir Kontak

Name

Email *

Message *

Powered by Blogger.